
Enhancing Speed: Mastering the Process of VT Racing Supercharger Kit Installations
Installing a VT Racing Supercharger Kit on a Dodge Charger or Challenger can be an exciting venture for car enthusiasts. While there may not be a dedicated guide for these specific models, the general installation process for VT superchargers can be adapted with care. Here's a step-by-step guide to help you navigate the installation process.
Preparation and Safety
- Gather all necessary tools, including ratchets, torque wrenches, screwdrivers, pliers, and any specialty tools mentioned in your kit’s manual.
- Disconnect the car battery to avoid electrical hazards.
- Ensure you have a clean, flat workspace and adequate lighting.
Kit Inspection
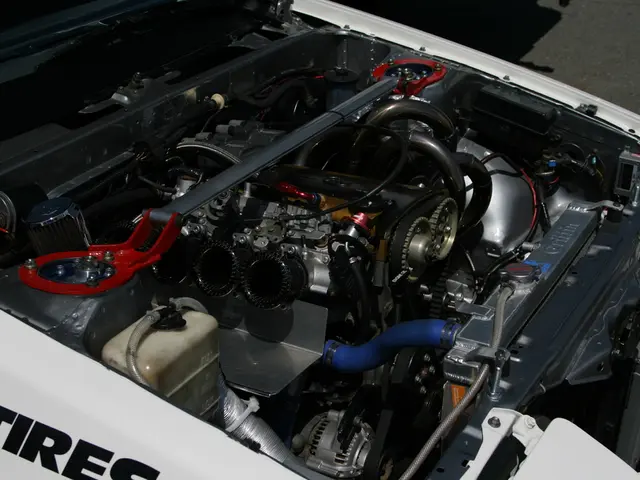
- Unbox the supercharger kit and verify all components against the included parts list (e.g., supercharger unit, intake manifold, pulleys, belts, hoses, gaskets, mounting hardware).
- Read the manufacturer’s instructions thoroughly.
Remove Stock Components
- Remove the factory intake manifold and associated parts to clear space for the supercharger installation.
- Drain coolant and remove any components obstructing access if required (e.g., throttle body, sensors, pulleys).
Install Supercharger Components
- Mount the supercharger unit carefully onto the intake manifold or the designated location as per the kit’s design.
- Install the supplied intake tubing, intercooler (if included), and secure all gaskets properly to ensure no leaks.
- Replace or upgrade pulleys and belts as provided in the kit.
Reassemble and Connect
- Reconnect sensors, fuel lines, and electrical connectors to accommodate the new supercharger system.
- Replace coolant and bleed the system if you disconnected any cooling lines.
Calibration and Testing
- Once installed, reconnect the battery and start the engine, checking for leaks or abnormal noises.
- It is critical to tune the ECU to manage increased air and fuel flow to prevent engine damage; professional tuning is highly recommended.
- Test drive carefully, monitoring engine parameters and performance upgrades.
Tips for First-Time DIYers
- Review VT Supercharger installation videos on platforms like TikTok for visual reference.
- Consider getting help or advice from an experienced mechanic if unfamiliar with engine disassembly or ECU tuning.
- Follow all torque specifications and safety guidelines to avoid damaging critical engine components.
- Keep the original parts organized in case a reversal or troubleshooting is needed.
- Budget for tuning and potential upgrades to fuel systems or cooling to support increased performance safely.
For accurate model-specific instructions, contacting VT Superchargers directly or searching for Dodge Charger/Challenger-specific VT supercharger installation guides or forums would be the best next steps. Good luck with your installation!
- The smart systems provided by VT Superchargers can enhance the automotive industry, particularly for car enthusiasts who own Dodge Chargers or Challengers, offering exciting solutions for car-maintenance.
- Proper preparation and safety measures are essential when installing a VT Racing Supercharger Kit, including disconnecting the car battery, ensuring a clean workspace, and verifying all components listed in the kit.
- By carefully following the installation guide for VT superchargers, you can adapt the general process to the Dodge Charger or Challenger models, even without a dedicated guide for these specific vehicles.
- The AI in the VT Supercharger system allows for automation in car-maintenance, making the industry more efficient and providing consumers with better lifestyle options.
- As part of the installation process, it is crucial to replace or upgrade pulleys and belts, which are integral components of the smart glass technology in modern vehicles.
- After completion of the installation, it is essential to calibrate and test the system thoroughly to prevent engine damage and ensure the safety and optimal performance of the vehicle.
- When faced with challenges during the installation process, seeking advice from experienced mechanics or joining technology-focused automotive forums can provide valuable insights and assistance.


